Where Do I Place TENS Pads? The Ultimate Placement Chart for Every Pain.
We’ve all been there, holding a TENS machine in one hand and a handful of sticky pads in the other, wondering, “Does this actually go exactly where it hurts, or next to it?” It’s a moment of frustration when you just want the aching to stop so you can get back to your day, play with your kids, or finally get a good night’s sleep.
The truth is, placement isn’t just about sticking a pad on your skin; it’s about the clinical interface, the precise point where electrical energy becomes life-changing therapy. If the placement is wrong, the signal is distorted, and you lose that precious relief.
Here is your guide to mastering the “Geography of Relief” using Polar Frost® Electrode Technology.
The Golden Rule: Surround the Pain
To effectively block pain signals, you want the electrical current to flow through or around the affected area. Think of it as creating a “therapeutic zone”.
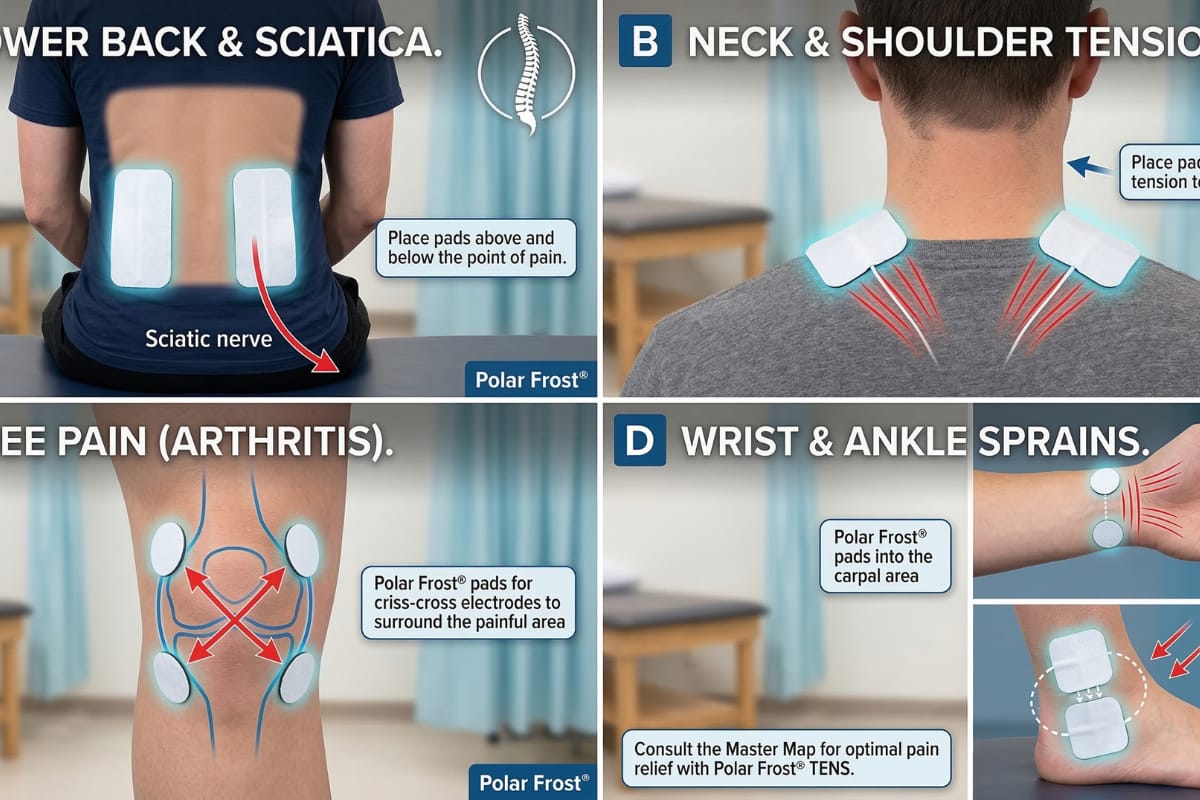
- Lower Back & Sciatica (The Constant Ache)
Lower back pain can feel like a heavy weight you’re forced to carry. To lift it:
- The Goal: Target the large muscle bellies of the lumbar paraspinals.
- The Pad: Use 5x9cm Oval Pads.
- Why: The lower back has a natural arch. Rectangular pads have sharp corners that act as “stress points” and peel off when you move. Our ovals eliminate those corners, staying secure even when you bend or twist.
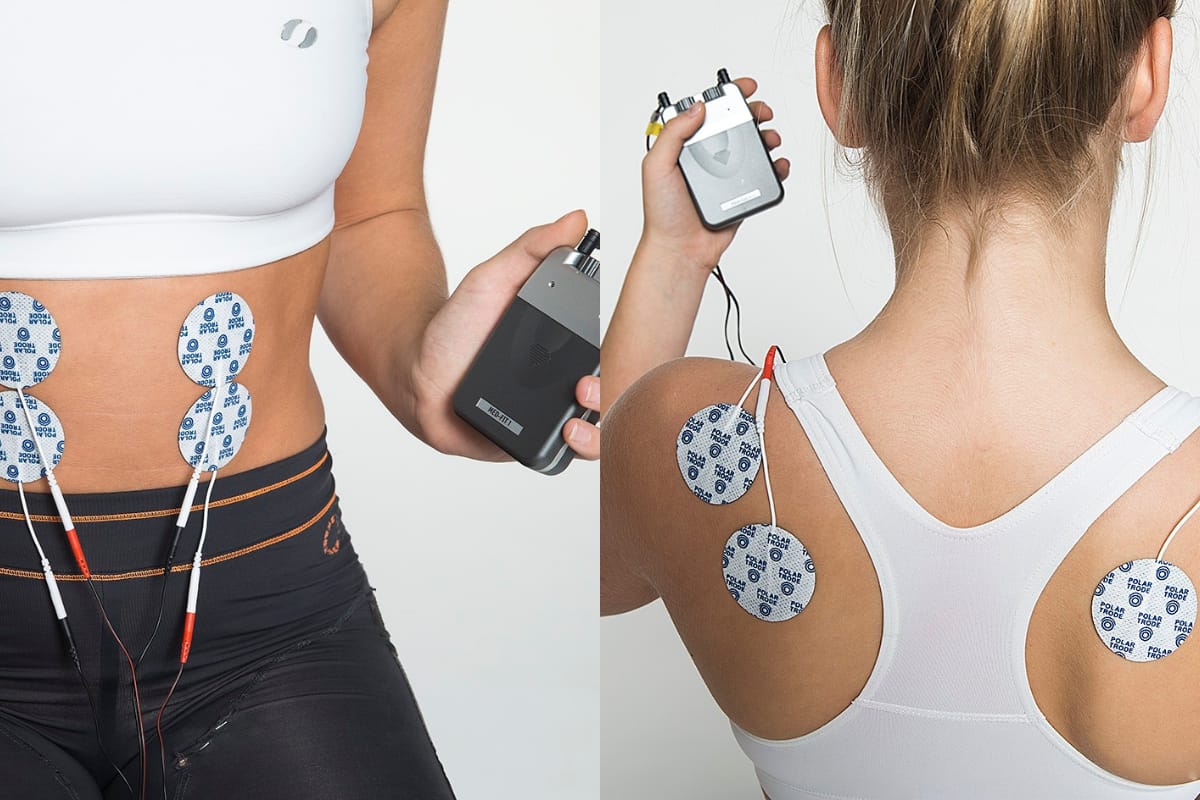
- Placement: Place one pad on either side of the spine, parallel to the bone.
- Knee & Elbow (The Joint Jabs)
Joint pain is tricky because every time you move, your skin stretches, causing standard pads to pop off.
- The Goal: Maintain contact during movement (isotonic muscle contractions).
- The Pad: 5cm Round Pads.
- Why: Round pads have “no leading edge,” which makes them aerodynamically superior for joints that are constantly bending.
- Placement: Place pads above and below the joint, or on either side of the kneecap (patella).
- Neck & Shoulders (The Tension Trap)
That tightness in your shoulders after a long day at the desk requires a balance of coverage and precision.
- The Goal: Target the Upper Trapezius or Deltoids.
- The Pad: 5x5cm Square Pads.
- Why: This is the clinical “gold standard” size. It’s large enough to treat the pain but small enough to avoid stimulating unwanted neighbouring muscles.
- Placement: Place pads directly over the “trigger points” or the areas of highest tension on the shoulder blades.
- Wrists & Ankles (The Pinpoint Precision)
Small areas like the wrist (tennis elbow) or the ankle (sprains) require high current density to work.
- The Goal: Focal stimulation in narrow spaces.
- The Pad: 3.2cm Small Round Pads.
- Why: Large pads “bridge the gap” over bony areas like the ankle bone (malleolus) and lose contact. These small rounds fit right into the depressions for maximum effect.
Why Polar Frost® Makes the Difference
Whatever your placement, you shouldn’t have to deal with a sharp “biting” or “stinging” sensation. Many inferior pads suffer from “current dumping”, where electricity pools in one spot and causes skin pain.
Our solution is a specialised low-impedance hydrogel. It ensures the electrical wave enters your tissue smoothly and uniformly across the entire pad. Plus, because they are 100% latex-free, you don’t have to worry about itchy allergic reactions: just pure, drug-free relief.
Ready to find your perfect fit? Explore our full range of [Polar Frost® Precision Electrodes] and take the first step toward a pain-free tomorrow.